Anyone who has worked with resistance welding equipment has probably experienced this situation: a weld schedule that was previously qualified, documented and successfully used in production that suddenly isn’t producing the weld it’s supposed to produce.
Like so many others, I recently experienced this situation working with a customer who had an established resistance spot welding schedule that had been qualified by his predecessor. The parameters were documented, the allowable ranges were known and there was every reason to expect that operating within those limits would produce an acceptable weld. Except it didn’t.
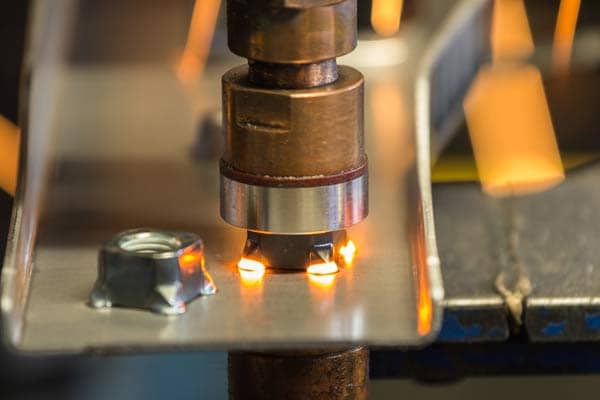
He couldn’t obtain a conforming weld nugget while remaining within the bounds of the previously qualified schedule. At some point, I told him that he had to stop asking, “What am I doing wrong?” and start asking, “What has changed since this schedule was originally qualified?” Eventually, the question led to an answer: the need to requalify the weld schedule.
There can be a tendency to think of a qualified resistance welding schedule as a permanent recipe made up of weld force, current, times, squeeze time, hold time and electrode geometry. Document those values and qualify the weld and use it indefinitely, right? Unfortunately, resistance welding doesn’t work that way.
The weld schedule is only one part of the welding process. The machine, electrodes, tooling, secondary circuit, cooling system, pneumatic system, material, surface condition and mechanical condition of the welder all contribute to what actually occurs at the weld interface.
A schedule qualified several years ago was qualified using the machine and process conditions that existed at that time. The numbers may not have changed, but the welding system may have.
Areas of change
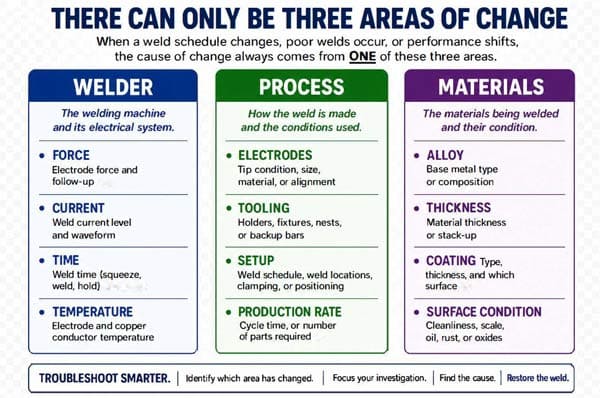
In that regard, there are only three areas of change. When a previously qualified resistance welding schedule stops producing an acceptable weld, troubleshooting can quickly become complicated. There may be dozens of things to inspect, measure or question, so instead of changing the weld schedule, simplify the troubleshooting path and remember that something has changed and it could only be in one of three areas: the welder, process or materials.
1. The welder: The first area to check is the resistance welding machine itself by asking a basic question: Is the welder still delivering what it was delivering when the schedule was originally qualified? The machine may still be programmed for exactly the same weld schedule, but that doesn’t mean the system is behaving exactly as it did when the schedule was originally qualified.
Resistance welders are production machines, and production machines age: bushings wear, bearings develop clearance, electrode holders deteriorate, connections oxidize or loosen, shunts degrade and cables are replaced. The list goes on and on. Maintenance can also change. A component may have been replaced with a slightly different component or a secondary connection may have been rebuilt. The machine may have undergone repairs or adjustments.
While none of these changes necessarily result in a defective machine, it could simply mean the machine may no longer be electrically, mechanically or thermally the same as when the original schedule was qualified.
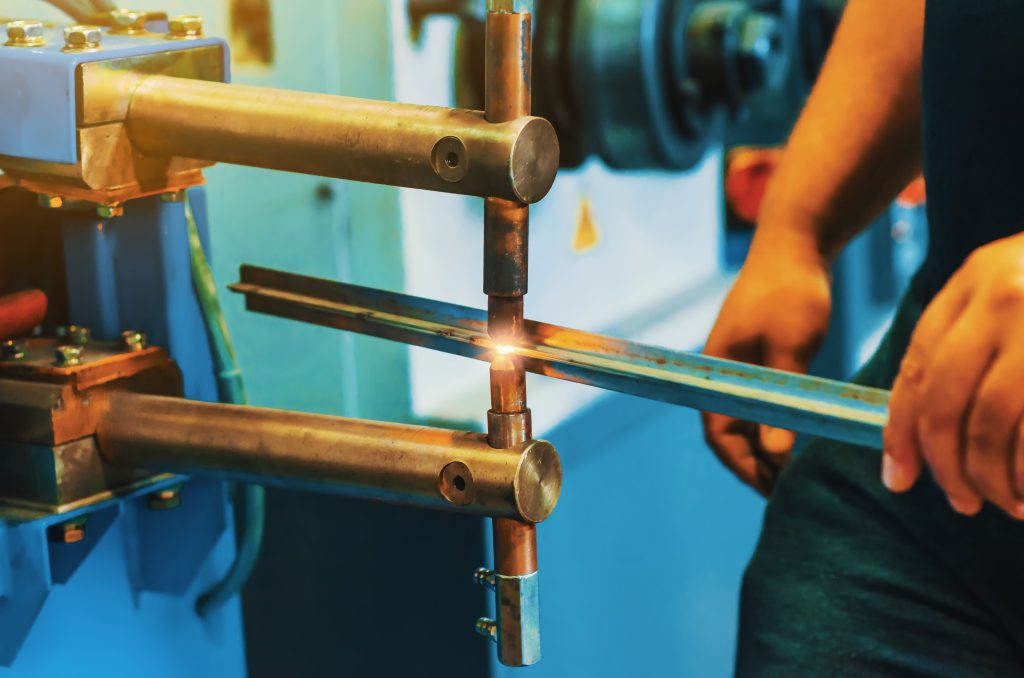
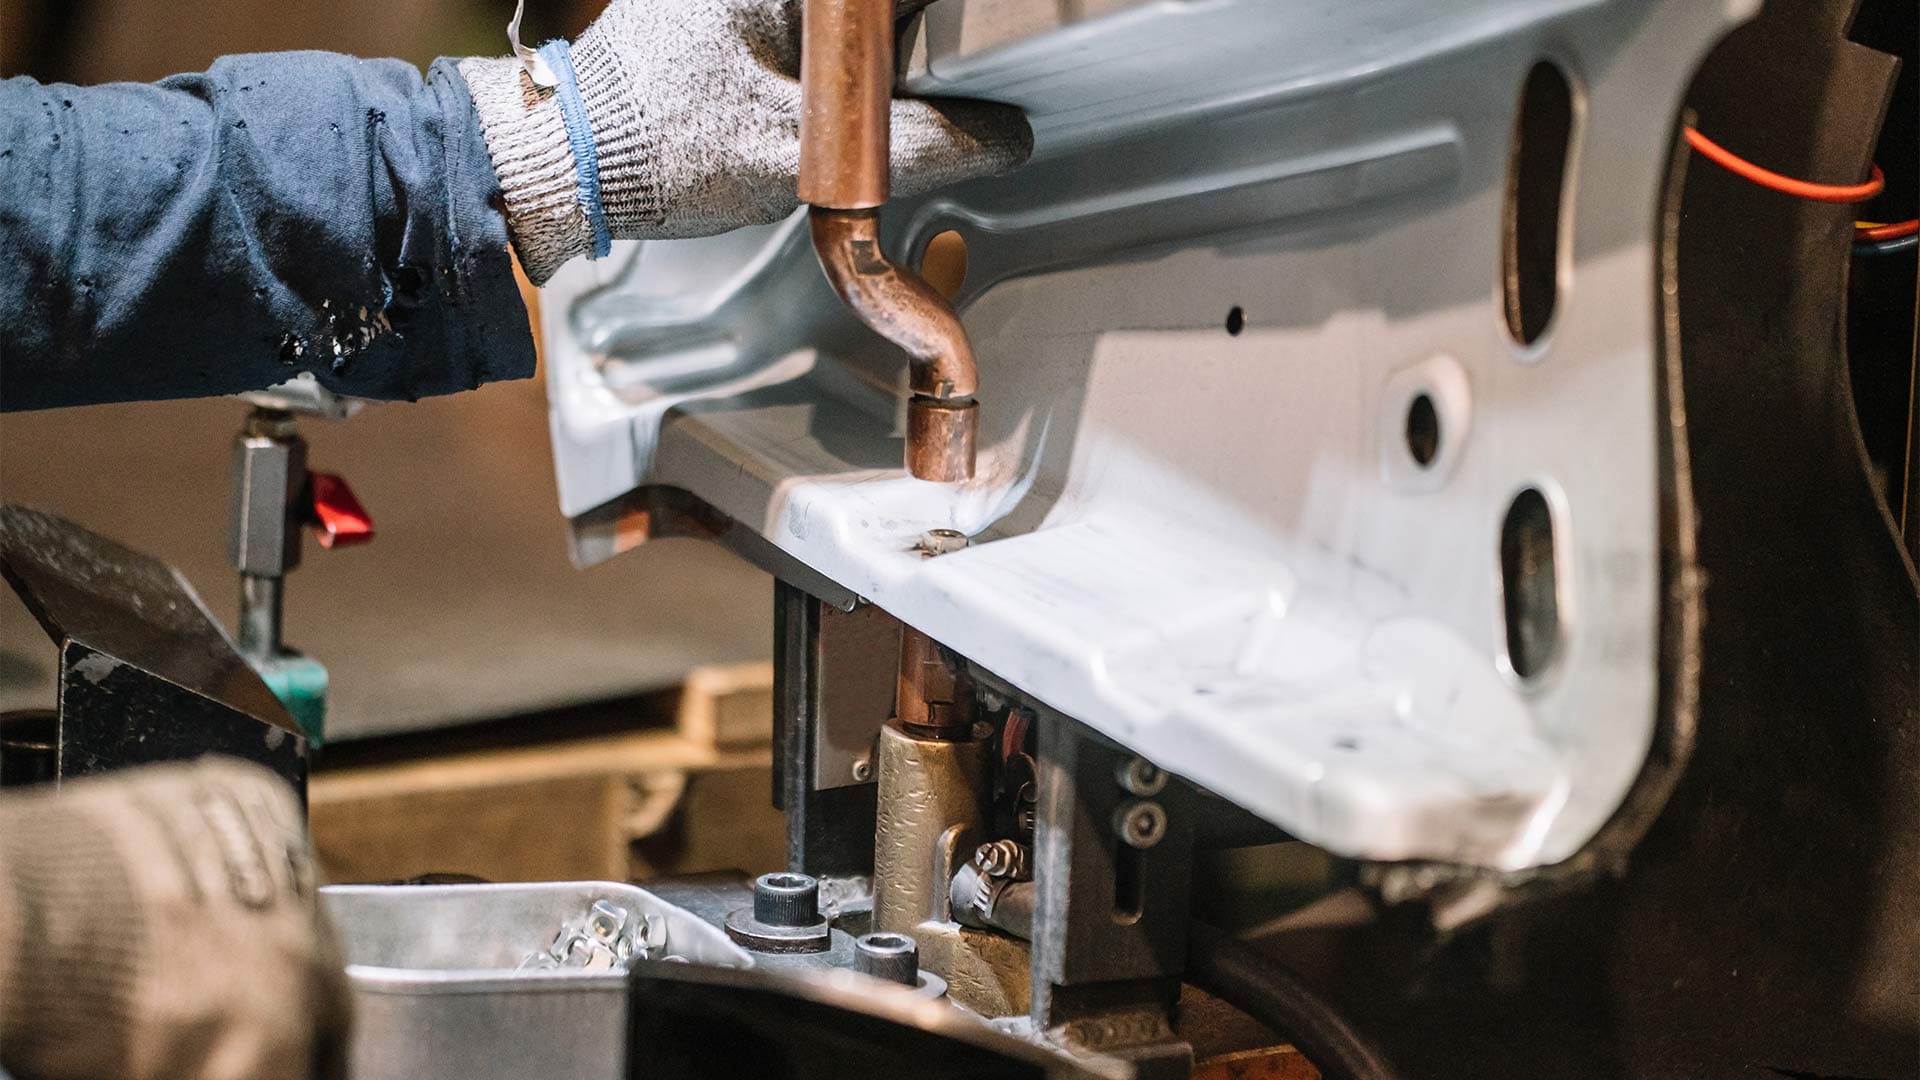
A close look at the machine should include a review of the actual electrode force, secondary welding current and weld timing. Check the transformer and tap configuration, secondary connections, flexible shunts, cables, electrode holders, electrode arms, and bearings and bushings. Look at the alignment, pneumatic or hydraulic system, and cooling water flow. Also, pay particular attention to the temperature of the copper components.
For the recent customer situation, the lower electrode and lower electrode holder were becoming noticeably hot. Because the electrical resistance of copper increases with temperature, excessive heating changes the electrical characteristics of the secondary circuit.
2. The process: If the welder checks out, look at the process. A qualified schedule isn’t simply a combination of current, force and time. It was qualified as part of a complete welding process. Something as simple as an electrode change can alter the welding conditions.
Consider the electrode alloy, face diameter, geometry, condition, dressing and electrode alignment. Also, look at the tooling, part positioning and gaps, fit-up and cooling conditions. Look at the production rate, weld sequence and spacing, operator setup and maintenance practices.
3. The materials: The third area is the material itself. A material may have the same part number or nominal specification and still exhibit enough variation to influence resistance welding. Check the alloy, material specification and material thickness, its hardness or heat-treatment condition, as well as the coatings and thicknesses. Look at the surface condition, including oxides, oils or lubricants and overall cleanliness. Check the mill or supplier, lot-to-lot variation and storage conditions.
This is particularly important because resistance welding depends heavily on electrical and contact resistance. A relatively small change in surface condition, coating, thickness or material properties can alter where and how quickly heat develops.
Hot copper
When I noticed the excessive heating of the lower electrode and lower electrode holder on the customer’s welder, it raised a red flag. It was more than a cooling issue, though. This type of heating can affect the electrical characteristics of the welding circuit. Copper is an excellent electrical conductor, which is exactly why it’s used extensively throughout the secondary circuit of a resistance welder.
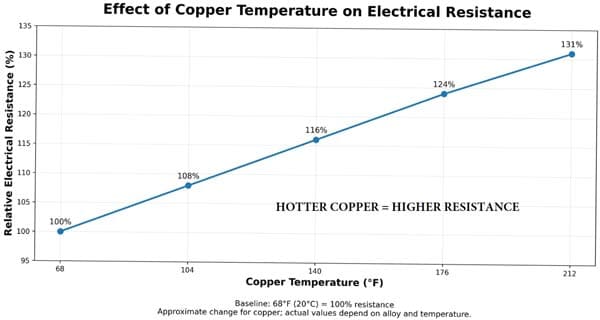
However, as the temperature of copper increases, its internal electrical resistance increases. As the lower electrode and electrode holder become hotter, their resistance increases. A greater portion of the electrical energy can then be lost within secondary components rather than being delivered efficiently to the intended weld interface.
This can become especially important during repetitive production welding. The first few welds may be made with relatively cool electrodes and holders. As production continues, insufficient cooling, restricted water passages, scale buildup, deteriorated electrical connections or excessive resistance at the electrode-to-holder connection can allow those components to become progressively hotter, which raises an important troubleshooting question: Is the weld schedule being evaluated under the same thermal conditions that exist during actual production?
A hot electrode holder can also be a symptom of another resistance problem. A loose, oxidized, contaminated or poorly seated electrical connection can create localized resistance.
Because resistance welding heat follows the basic relationship of Heat = I²Rt, where I = current, R = resistance and t = time, even a relatively small increase in resistance can generate significant unwanted heating when thousands of amperes are passing through the secondary circuit. That heat is being generated somewhere other than where it’s wanted.
The objective is to concentrate the required heat generation at the faying interface between the workpieces, not in the electrode, electrode holder, shank, connection or secondary conductor. The schedule may still contain exactly the same numbers, but the machine delivering those numbers may no longer be exactly the same machine.
Start with the basics
When troubleshooting a resistance weld that has stopped producing acceptable results, I like to return to four basic variables: force, current, time and temperature. The first three – force, current and time – are familiar resistance welding variables. The fourth, temperature, refers specifically to the temperature of the copper components in the welding secondary circuit. These factors provide a practical starting point for determining whether the weld schedule has changed or whether the machine’s ability to deliver that schedule has changed.
Force: Verify the actual electrode force rather than assuming the regulator setting represents the force being delivered at the workpiece. Changes in air pressure, cylinder condition, friction, alignment, tooling, bearings, bushings or machine geometry can affect actual electrode force.
Force influences contact resistance. Too much force can reduce resistance at the faying interface and make nugget initiation more difficult. Too little force can contribute to excessive interface resistance, expulsion, inconsistent electrode contact and electrode damage. When troubleshooting a previously qualified schedule, measure the actual force at the electrodes.
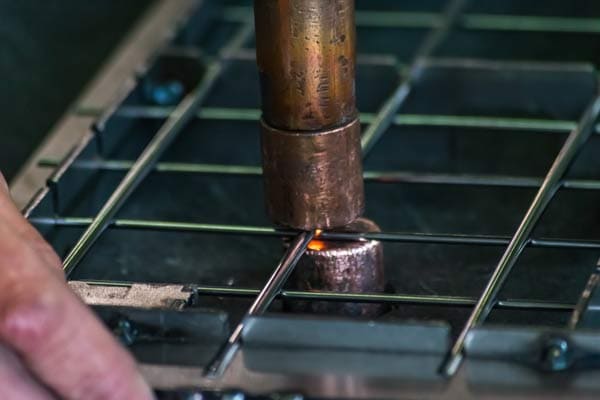
Current: Measure the actual secondary welding current. Don’t assume that because the control is programmed for a certain current, that exact current is reaching the weld. Changes in transformer connections, secondary cables, flexible shunts, electrode holders, electrode seating surfaces or other electrical connections can affect current delivery. This becomes particularly important when troubleshooting an older machine or a machine that has undergone maintenance since the original weld schedule was qualified.
Time: Confirm the actual weld time and welding sequence. Time determines how long electrical current is allowed to generate heat. Even when the weld time itself is correct, changes in force, current, resistance or component temperature can cause the same weld time to produce a different result. A schedule that once produced the correct nugget in a given number of cycles or milliseconds may no longer do so if other characteristics of the welding system have changed.
Temperature: Temperature of the copper components is often overlooked. The electrodes, electrode holders, shanks, arms, flexible conductors and other portions of the secondary circuit are expected to carry extremely high welding currents while remaining adequately cooled. That’s one reason proper water cooling is so important.
As copper gets hotter, its electrical resistance increases, which means a hot electrode or electrode holder doesn’t conduct electricity as efficiently as it does when it’s cooler. In the situation I encountered, the lower electrode and lower electrode holder were getting noticeably hot.
That immediately raised an important question: Was the temperature of the copper changing the electrical characteristics of the secondary circuit enough to affect the qualified weld schedule?
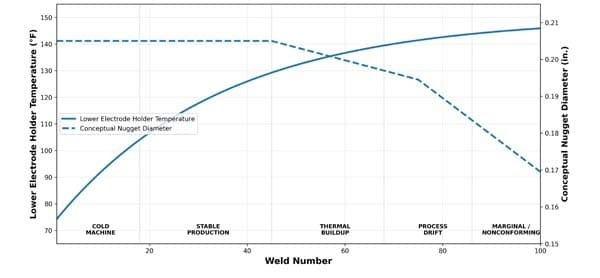
If the lower electrode holder is becoming unusually hot, investigate more than just the weld schedule. Check cooling water flow, inlet water temperature, restricted water passages, scale or mineral buildup, missing water tube or its position, cooling hose condition, electrode seating, electrode-to-holder contact surfaces, electrode condition and secondary electrical connections.
There can also be a compounding effect: Increased resistance produces higher heat and increased copper temperature produces still higher resistance, which produces higher heat, which produces higher resistance and so on. Under repetitive production conditions, this can contribute to thermal drift. A machine may behave one way when it’s cold and differently after making dozens or hundreds of welds.
Control settings
One of the most important principles in troubleshooting is understanding the difference between a programmed value and an actual delivered value. A weld control may indicate a certain current, force and time have been programmed, but what’s actually happening at the electrodes?
If the schedule calls for a certain current, is that current actually flowing through the workpiece? If a specified electrode force is required, is that force actually being delivered at the electrode tips? Is the weld time accurate? Are the electrodes making full and consistent contact? Are the copper components operating at an acceptable temperature? Is the secondary circuit introducing resistance that didn’t exist when the schedule was originally qualified? These are important distinctions to make.
When a previously qualified schedule suddenly stops working, my first reaction isn’t to start changing the welding current. Increasing current may produce a larger nugget, but it may also hide the real problem. Before changing qualified parameters, investigate the welding system. Verify the actual welding current and electrode force, weld time and temperature of the copper components.
Also verify the electrode’s tip diameter and geometry, alignment and condition. Check secondary connections, flexible shunts and cables, cooling water flow, tooling condition, and material thickness, specs and surface condition. Look at fit-ups and machine repeatability.
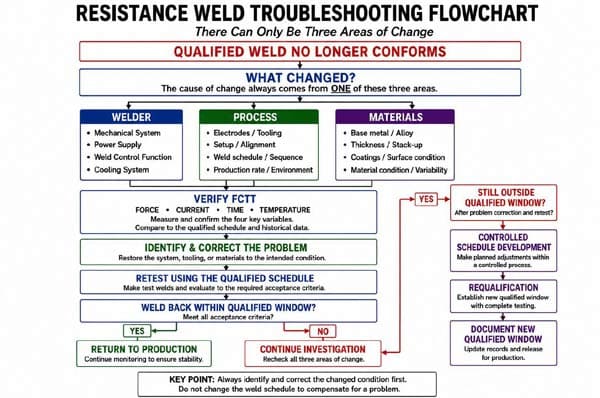
Then return to the three basic areas: the welder, process and materials to answer the most important question: Did something change in the system or does the schedule actually need to change? Sometimes, requalification is the correct answer.
After verifying the welder, process and materials, there may come a point where the original qualified window simply won’t produce the required weld. That’s what the customer encountered. He couldn’t obtain a conforming nugget while staying within the limits of the previously qualified schedule.
Rather than forcing the machine to operate within a historical parameter window simply because that window was documented, the responsible decision was to establish a schedule that produced the required weld quality and then requalify the schedule according to the applicable requirements.
That doesn’t necessarily mean the original schedule was wrong. It could’ve been completely appropriate when it was developed. The more accurate conclusion may be: The conditions under which that schedule was originally qualified no longer exist in exactly the same form. That distinction is important.
Controlled changes
Requalifying a resistance welding schedule shouldn’t involve randomly changing parameters until something passes. A systematic approach should be used. First, establish that the welding equipment is functioning correctly. Next, verify the material, electrodes, tooling, cooling, alignment, force, actual current and copper component temperatures. Then establish a reasonable starting condition and develop a weld window by changing controlled variables.
Typically, the objective is to determine the range between two limits – the lower limit where an acceptable nugget can no longer be consistently produced and the upper limit where expulsion, excessive indentation, electrode sticking, unacceptable surface damage or another limiting condition occurs.
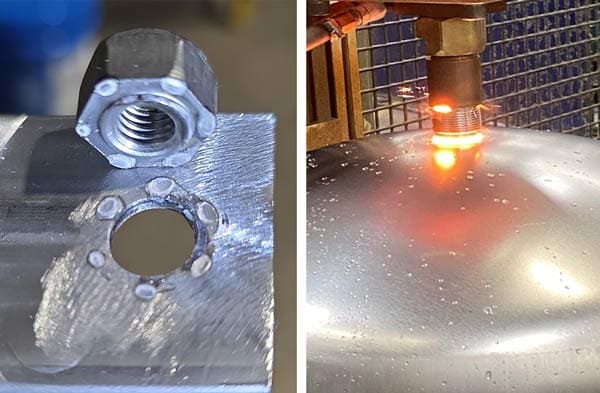
The production schedule should then be positioned comfortably inside that window rather than directly against one of its boundaries. A robust resistance welding schedule isn’t simply a setting that makes one good weld. It’s a process window capable of repeatedly producing acceptable welds despite normal production variation where documentation, specifications and qualified schedules are essential.
If destructive testing shows that the required nugget isn’t being produced, the fact that the control settings match an old qualification sheet doesn’t make the weld acceptable. Determine the source. That may mean identifying a machine problem, correcting electrode geometry or force, repairing or better cooling the secondary circuit, or addressing material or fit-up changes. It may also mean acknowledging that a qualified schedule that once worked needs to be re-evaluated and requalified.
Lessons learned
One of the lessons reinforced by this experience is that weld qualification shouldn’t be viewed as the end of process control. Qualification establishes that a defined welding process is capable of producing an acceptable weld. Maintaining that capability requires continued verification.
Resistance welding equipment should, therefore, be periodically evaluated for changes in current delivery, electrode force, mechanical condition, secondary circuit resistance, electrode condition and geometry, cooling performance, temperature of the copper secondary components, alignment and weld quality. Trend this information over time, and many problems can be identified before they become weld failures.
There’s nothing unusual about a resistance welding schedule qualified years ago that no longer produces the same result. A lot can change with time. The important thing is the response.
Don’t automatically assume the old schedule is wrong or the machine is bad. And don’t simply increase the current until the weld passes.
When a previously qualified weld changes, remember that there are fundamentally three places to look: the welder, process and materials. Start with the force, current, time and temperature. Verify the machine, process, materials and what is actually happening at the electrodes and weld interface. Then let the weld quality determine what needs to happen next.
It could be maintenance or material related or require a setup or process correction. Sometimes, as I recently experienced, the correct engineering decision is to establish a new process window and requalify the weld schedule. Ultimately, it isn’t about trying to make the numbers on the weld control match a piece of paper. It’s about making a consistent, repeatable, conforming weld.
For the latest information about welding certification or codes, search our extensive archive.